Agipix (Real Robot) — Quick Guide
Use this page to jump into the full real-platform bring-up flow, from mechanical assembly to preflight checks.
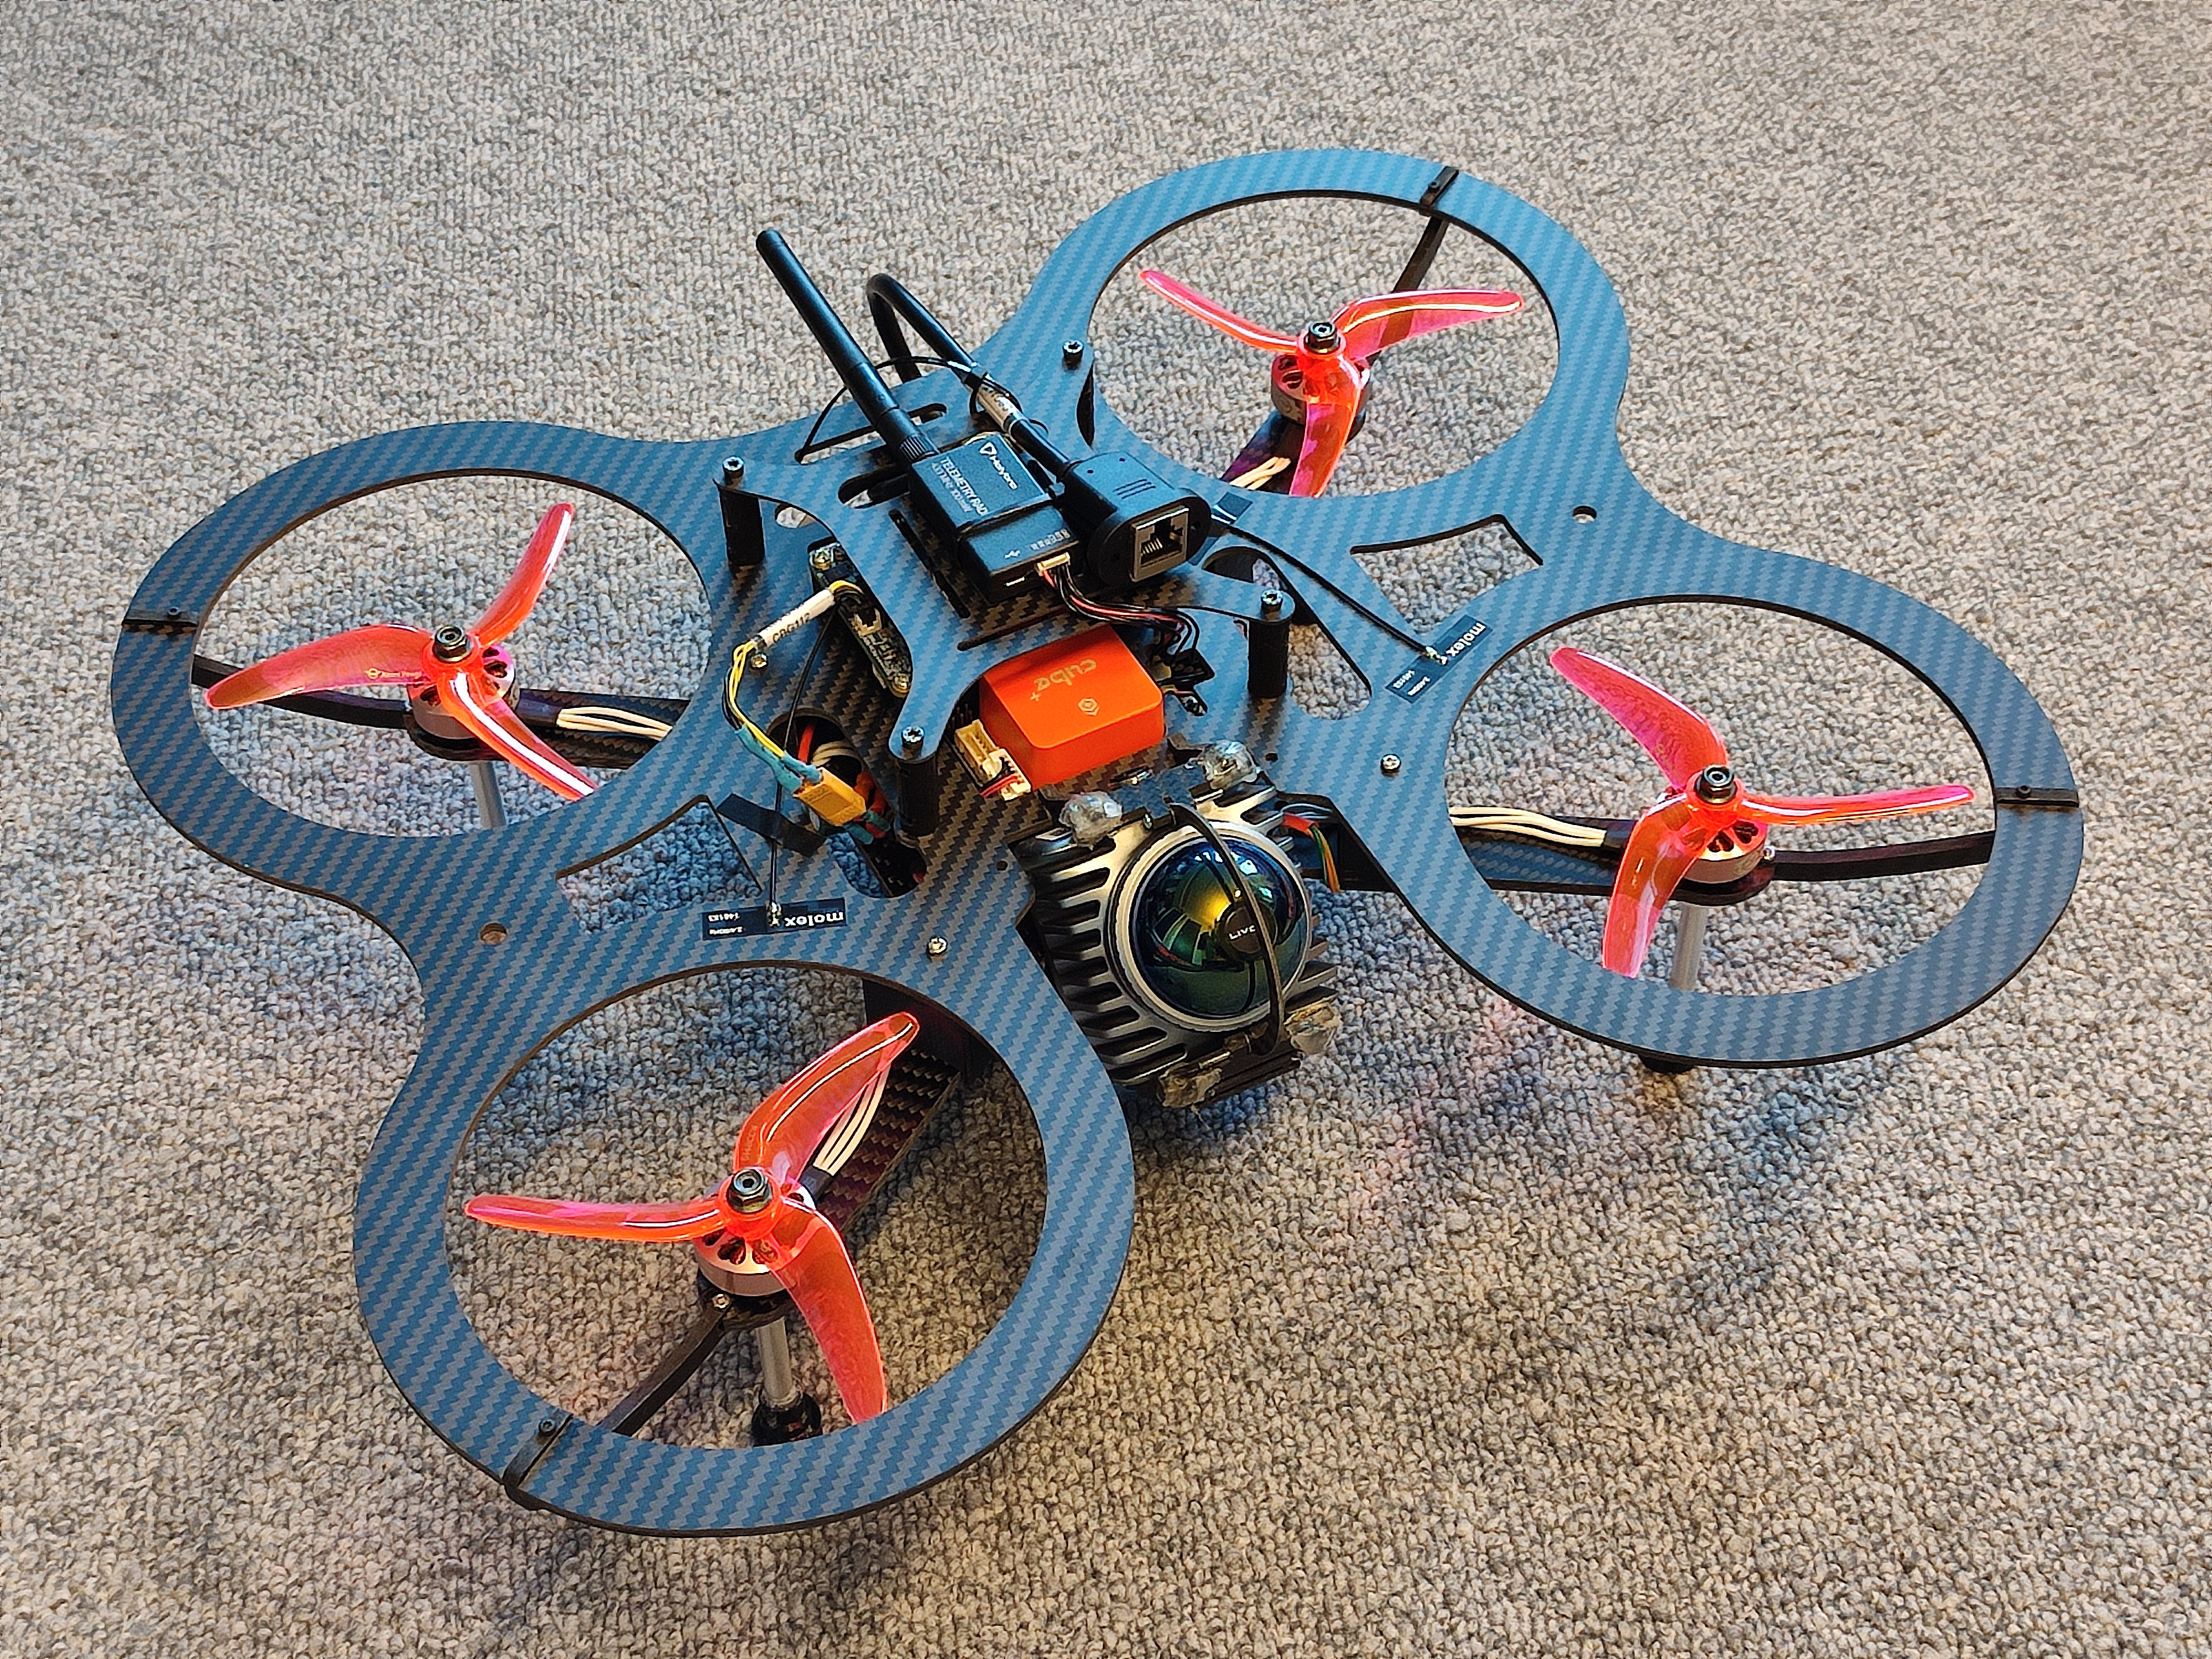
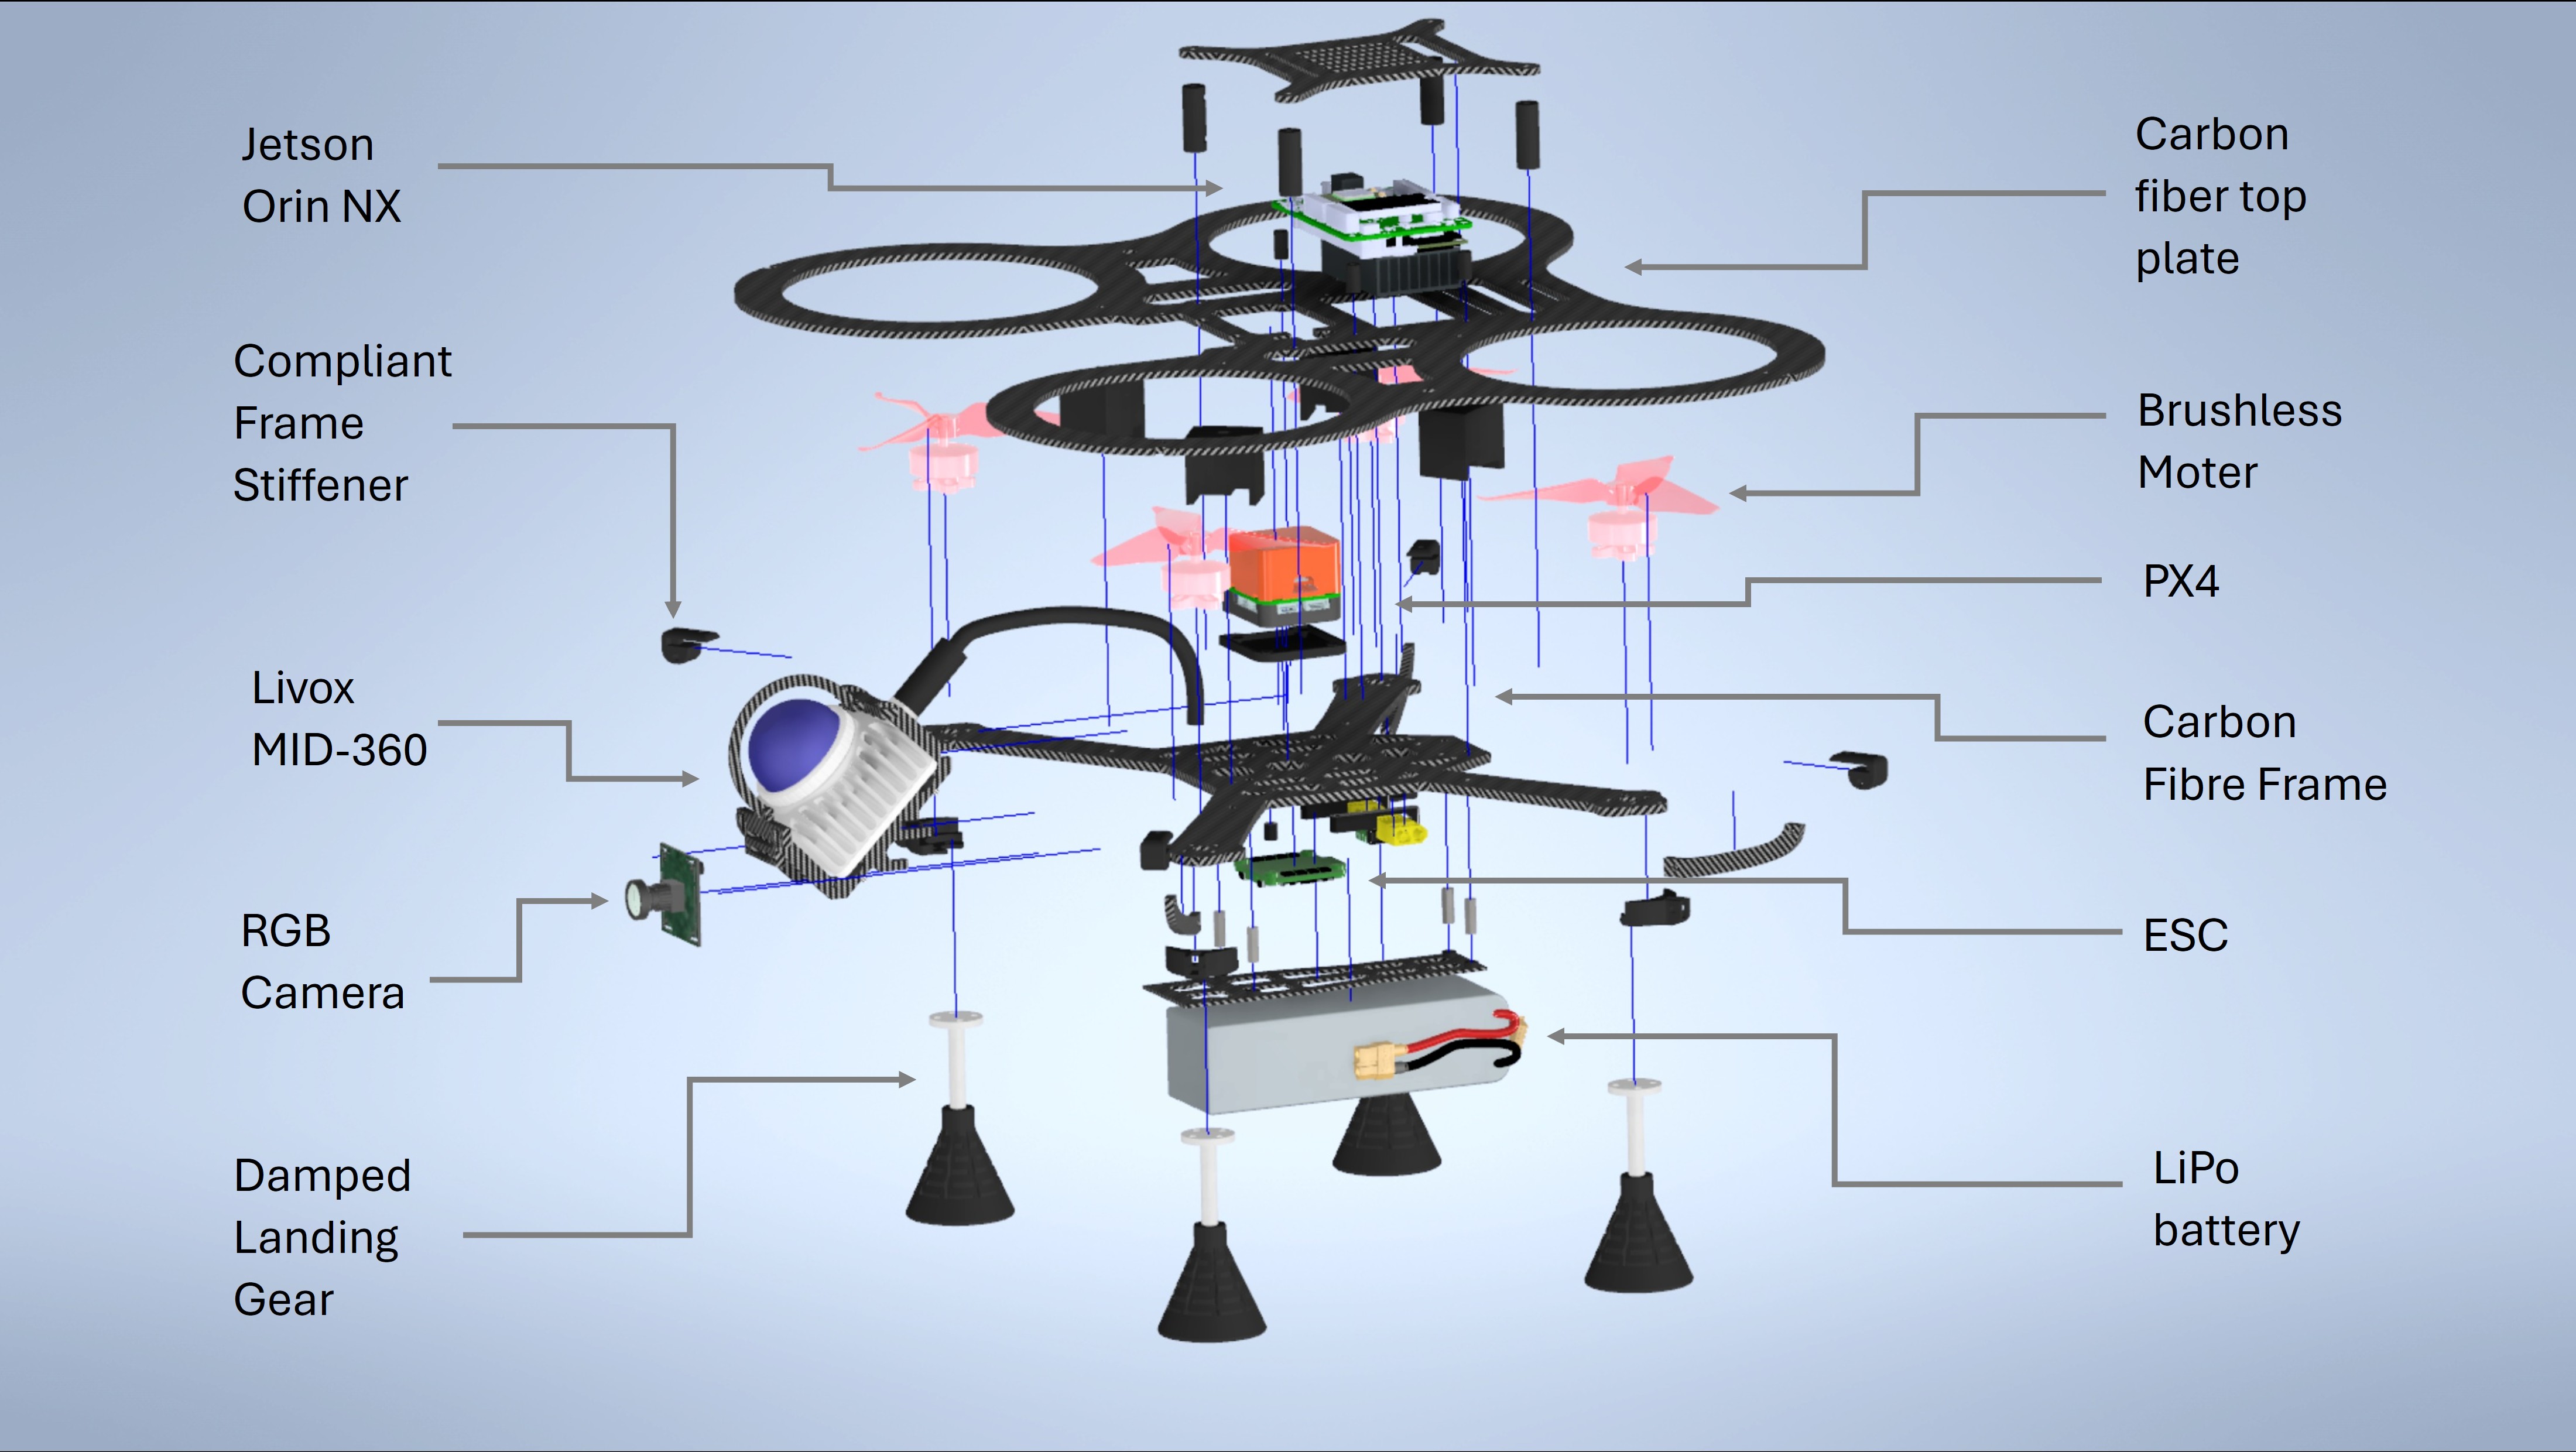
1) Hardware Assembly
- Cut CF plates from the provided DXF patterns and post‑process as needed.
- Print TPU parts from the STL set (recommended: 0.2 mm layers, 40% infill; higher for bushings).
- Assemble frame, power, ESCs, motors, radio/telemetry, and flight controller.
- Complete low‑level checks and a brief manual flight validation.
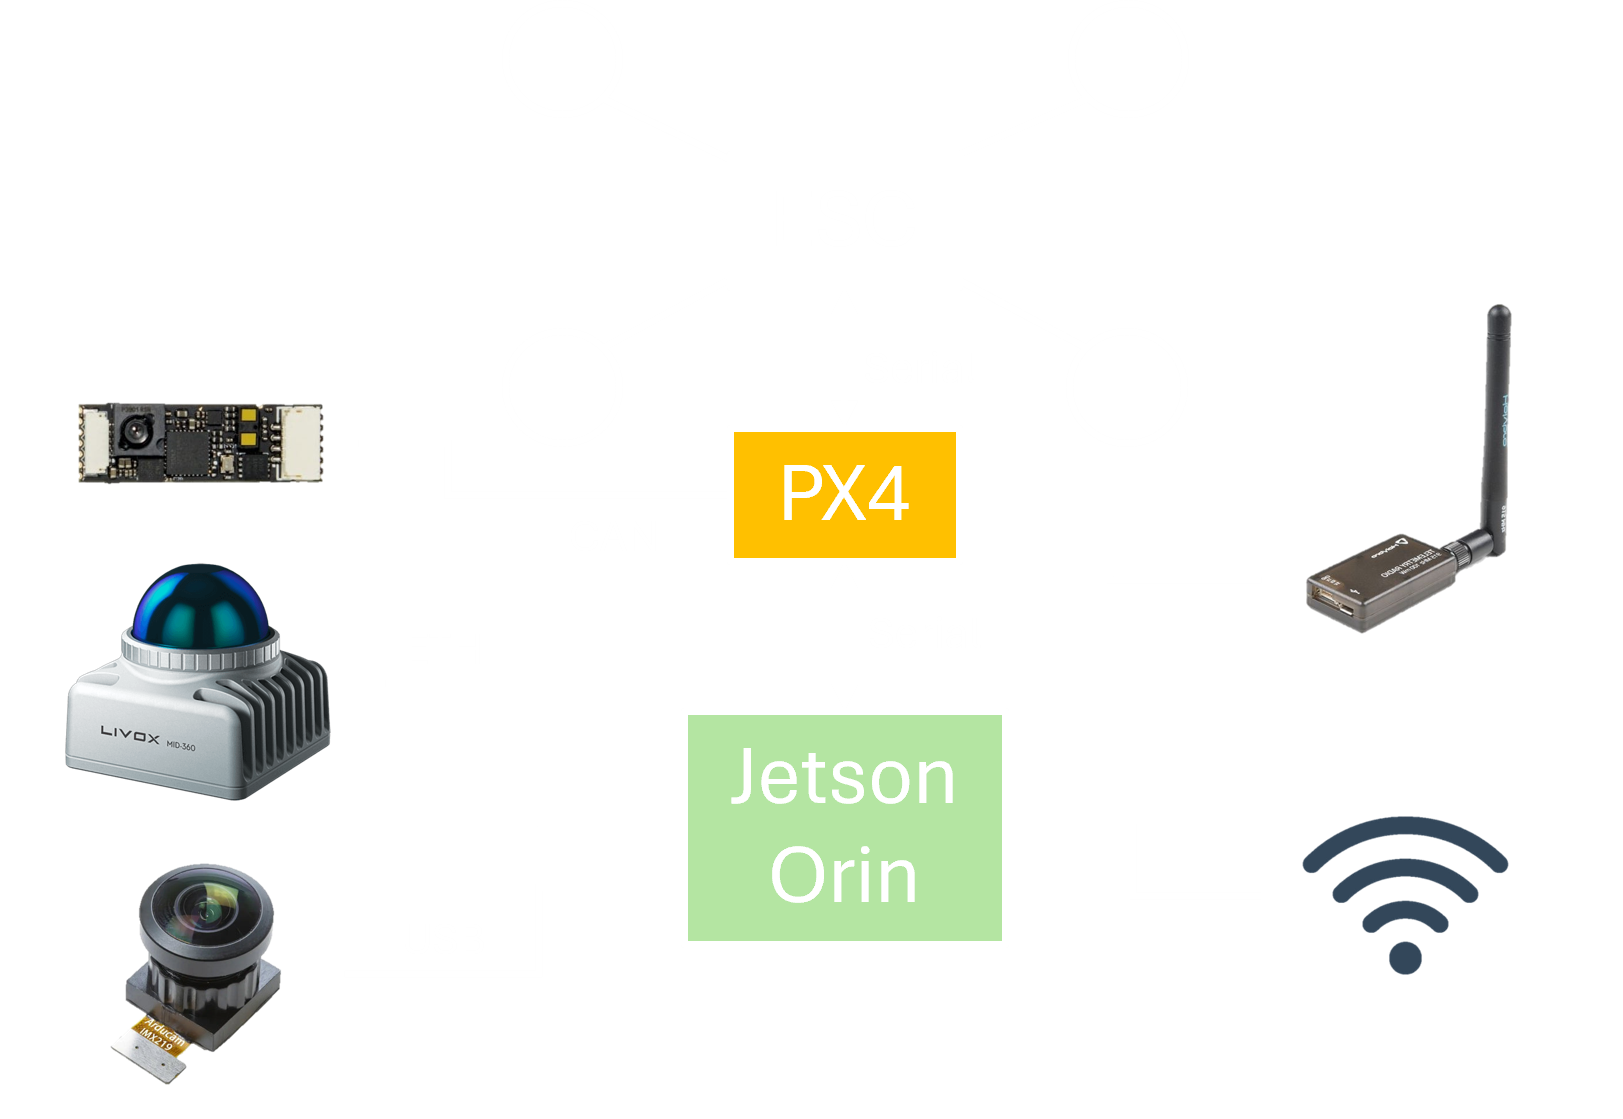
- Mount compute (Jetson Orin NX + Hadron), antennas, wiring, and sensor cage (Livox Mid‑360, optional RGB/RGB‑D).
Read: Hardware Assembly
2) Flashing the Hardware
- Target: JetPack 6.x (Jetson Linux R36.3) on Orin NX/Nano with Connect Tech carriers.
- Prepare BSP_ROOT with NVIDIA BSP + sample rootfs; install CTI L4T BSP.
- Put the board in recovery, then flash via CTI menu script or manual NVMe script.
- On first boot: complete setup, join Wi‑Fi, SSH in; consider NoMachine, nvpmodel, Docker/NVIDIA toolkit.
- Keep handy: CTI docs/KB and NVIDIA references linked in the guide.
Read: Flashing Hardware
3) PX4 and Sensor Interfacing
- PX4 low-level control wiring and DDS interface setup.
- LiDAR, monocular camera, and optional RGB-D sensor integration.
Read: Interfacing Sensors
4) Container and Software Setup
- Runtime is containerized; follow isaac_ros_common Docker setup.
- Branches:
agipix-hard(hardware),agipix-sim(simulation). - For sim instructions, see the simulation docs; for autonomy, continue to perception stack.
Read: Docker Build and Software Setup
5) MANET Mesh Networking
- Work-in-progress extension using Wi-Fi HaLow for long-range resilient links.
Read: MANET Mesh Networking
6) Preflight Checklist
- Mission readiness checks for power, sensing, comms, and safety.
Read: Preflight Checklist
Appendix — Hadron/Env Notes
File: hadron_cfg.txt
- Workspace layout hints for control, DDS agent, LiDAR drivers, and vision.
- Useful bash aliases and Docker entry helper.
- Sample nmcli snippet for a static wired IP.
.
Next steps: